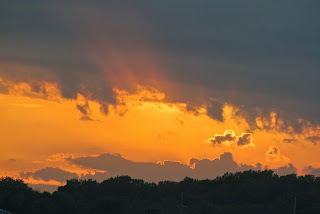
So, what’s going
on in our fields right now? Harvest is
finished! So that means that nothing is
going on in the fields right now…. YAY!!!
Some fields have been plowed and will lay that way until spring field
work. Other fields are not plowed, but
also lay untouched until spring.
I am so excited
that harvest is done! This year harvest
seemed to drag on. We had our fair share
of rainy days which slows up harvest significantly. Even though we had a few bumps in the road I
am thankful of several things after this harvest season; here are just a few J
 #1: MOST IMPORTANTLY…. my family remained safe
and healthy during harvest. I know there
are a lot of jobs that are hazardous, but according to the CDC, “Every
day, about 243 agricultural workers suffer a lost-work-time injury. Five
percent of these injuries result in permanent impairment.” Not
only remaining safe is a challenge, but after working such long hours, with no
“weekends” as a break many times a person just runs their body down and gets
sick, but everyone made through harvest unscathed, and for that I count my
blessings!
#1: MOST IMPORTANTLY…. my family remained safe
and healthy during harvest. I know there
are a lot of jobs that are hazardous, but according to the CDC, “Every
day, about 243 agricultural workers suffer a lost-work-time injury. Five
percent of these injuries result in permanent impairment.” Not
only remaining safe is a challenge, but after working such long hours, with no
“weekends” as a break many times a person just runs their body down and gets
sick, but everyone made through harvest unscathed, and for that I count my
blessings!
#2: The grain bin and dryer are up and
operational. The grain bin and dryer are
crucial to our operation. The
construction was quite a big project and didn’t wrap up until after harvest
started so that was stressful….but it is done now! J
Here are some pictures of the progression of the grain bin being built. Over just a few days it was up, but then took
quite some time before it was operational.


#3: We had
bountiful yields! We don’t have any
irrigation systems on the ground we farm so you can only do so much to help the
crop along throughout the year; aim for optimal planting times, apply fertilizer,
control pests, etc. But, we still rely
on Mother Nature. This year we couldn’t
complain about how the plants matured and the crops yielded!

 #4: Styrofoam take out containers are easy to
find! I know this sounds a bit silly,
but these handy containers make my life so much easier when trying to get meals
out to the fields. Getting hearty
dinners out to everyone I feel like is essential to keep things running as
smooth as possible. The first year I
took food to the fields I tried doing so in nice plastic containers I wanted
back, or on paper plates, or wrapped in foil….I tried everything and nothing is
as handy as these containers J
#4: Styrofoam take out containers are easy to
find! I know this sounds a bit silly,
but these handy containers make my life so much easier when trying to get meals
out to the fields. Getting hearty
dinners out to everyone I feel like is essential to keep things running as
smooth as possible. The first year I
took food to the fields I tried doing so in nice plastic containers I wanted
back, or on paper plates, or wrapped in foil….I tried everything and nothing is
as handy as these containers J
#5: And lastly, but most motivating, is that we
will be able to do what we love again next year. We will learn from hurtles this year, and
continue with practices that worked well.
I feel blessed to be doing what we love and raising our kids to work
hard, reflect on the good and bad, and persevere!


